Tuesday, April 28, 2015

How To Grow Zucchini Squash

Growing zucchini (Cucurbita pepo) in a garden is very popular. This is because planting zucchini is easy and a zucchini plant can produce large amounts of delicious squash. Let’s take a look at how to plant zucchini and grow zucchini squash in your garden.


How to Plant Zucchini

When planting zucchini, you can plant them either as individual plants or grouped on hills. How you grow zucchini squash is up to you, based on how many zucchini plants you intend to grow and how much room you have to grow them.

After the chance of frost has passed, plant 2-3 seeds 36 inches apart. The seeds should be planted about an inch deep. Thin to one plant per spot once the seeds have sprouted and have grown their first set of true leaves.

Zucchini Plants on a Hill

After the chance of frost has passed, mound up soil about 6 – 12 inches high and 12 – 24 inches wide. On the top of the hill, in a circle, plant 4 – 5 zucchini seeds. Thin the seedlings down to 2 – 3 per hill once the seedlings have their first set of true leaves.

You can also start zucchini indoors in order to get a head start on the season. Start zucchini seeds indoors 4 – 6 weeks before the last from date and plant out in the garden after all chances of frost have passed.

Information on Growing Zucchini

Once seedlings are established, mulch around the plants. Mulching helps to keep the ground temperature stable and also helps the soil retain water. These two things will help the zucchini plant have an earlier and larger crop.

Make sure that your zucchini plants get at least 2 inches of water a week. If you do not receive enough rainfall to do this, supplement with manual watering. Use a soaker hose or other method to water the plants below their leaves. Watering using a sprinkler can cause the zucchini plants to develop powdery mildew.

Harvest zucchini squash when the fruits are small. This will result in a more tender and flavorful squash.

Growing zucchini in your garden is fun and easy. Now that you know how to plant zucchini and some tips on growing it well, you can grow zucchini squash in your garden with ease.

Thursday, April 2, 2015

How to Grow Soybeans

Growing soybeans has become increasingly popular with home gardeners.
Soybeans are high in fiber, protein, and nutritious. Soybeans are rich in vitamins A, B1, B2, and C, and contain high levels of Calcium and Iron. Perhaps best of all, they taste good ,too.
Home gardeners find it is easy to grow soybeans. Soybean plants are grown just like any other bush bean, and produce high yields.
Days to Maturity:
Soybean plants require about 85 days to harvest.
Try succession planting, for continuous harvest over several weeks.

Sowing Soybean Seeds:
Plant seeds outdoors after the last frost date for your area. Soil should be warm before planting.

Sow Soybean seeds 2 inches apart, in rows 20" to 24" apart.  If your garden space is limited, plant  the seeds in double rows. Water well after planting, and a second time two to four days later, only if there has been no rain. Side dress the rows with general purpose fertilizer during planting.

How to Grow Soybeans:
Soybean plants are easy to grow. They grow best in full sun and in warm weather. They prefer a rich soil, high in nitrogen. Soil should be kept moist for optimum growth.

Soybean plants grow best in rich soil. Add manure and compost prior to planting. Fertilizer regularly during the growth period.

Harvest soybeans when the pods are full.

Did you know? Soybean plants are rich in nutrients. After the harvest, put plants into the compost pile, or turn them into your soil.

Insects and Pests:
Like other beans, soybeans are susceptible to a variety of insects, most notably beetles. They can be treated with Sevin and many organic repellents.

Rabbits eat the the tender new leaves. If there are rabbits in your area, a rabbit fence is not a nicety, it is a necessity. They will devastate a row of beans in a hurry, eating the tender new leaves. As new ones develop, they will come back for more.

Diseases of Soybeans:
Bacterial and wilt diseases are common among the Bean family. This plant disease arrives with summer heat and humidity. This often occurs just before, or during, the ripening of the crop. Fungicides are recommended in areas of high heat and humidity.

Plant Problems - Diagnosis, causes and cures for many common plant problems.

Hardiness:
Soybeans are not a hardy plant. They are susceptible to cold and frost. Hold off planting until a few days before all danger of frost is past. In the fall, cover the crop on nights when the temperature is expected to go below 40 degrees.

Cooking Soybeans
The beans are edible. The pods are not edible.

Boil bean in lightly salted water for 4-5 minutes to blanch, or 20 minutes to fully cook. Discard the pods after removing the beans.  The beans can be frozen after blanching, then heated in the microwave later, for a quick, nutritious snack.. They can also be canned.

Thursday, March 12, 2015

How to Buy a Camel


Ask around. The livestock market is always the best place to start. This will be almost always on the outside of the town or village. Some are everyday, others are one day a week, so find out. You will be approached immediately, as you will undoubtedly look foreign, and expensive offers of a camel will follow. It’s a good idea to bring someone local you trust with you to help you and if possible, who can act on your behalf with bartering: they will know if you are getting your money’s worth and the price will almost certainly be lower for them.


If you are using your camel for a desert journey, strength is key. It will have to carry loads and/or you and if your camel is not used to work or is weak then this could pose a serious danger. Ask to see it stand and sit down again. The knees are important, so check for any trembling in the legs, a sure sign of a weak camel. Their rising and  sitting should be smooth, it should walk without a limp and the camel must be obedient. It goes almost without saying that a disobedient camel would spell trouble for you later. Check for any open sores and have a look at the pads on the underside of its feet, these should be without wounds. Also see that the camel can accept a rope through its nose or around its face and that it does not make too much of a fuss. Crucially this is to check whether it is a biter. Ask the camel’s age. Four to eight is ideal, as it will be experienced enough but too old.


The cost of a camel can vary dramatically depending on where it is bought, its size, its age and the conditions at the time (drought etc). A goodish camel at a time of plenty could go for £150, whereas a large camel in an area without many can be £1000 or more. When planning your expedition, try not to buy your camel(s) in an area
where camel is commonly eaten. This will push up the value. Lastly, remember there is no fixed price: barter like mad. This could well take days to get the price you want.


If you are riding, you’ll need a saddle. A camel stick is useful too.  You’ll need rope to lead it with and to hobble it when you are letting it graze. You will also need some blankets to act as a cushion between its back and the saddle. If you are using it to carry loads you will need more rope and strong sacks. Ask the camel seller if he can throw in any rope as this will save you trying to find it later. If you are going across desert that offers absolutely no grazing, then you must bring food for the camel, and the poor camel will have to carry this too. Camels will eat almost anything but hay is fine. Unlike their water situation, they must eat everyday so be sure to bring enough.


Try and sell it at an aforementioned livestock market. Again, barter hard as after a long desert journey they will try to take it off you cheaply. Make sure it has been well watered and well fed hours before selling: It will look noticeably larger. If you cannot find anyone to buy your camel(s), approach butchers. This may seem heartless, given that this animal has endured with you on your desert expedition, but they are expensive and to recoup some of your money a butcher’s is always a safe bet.

Thursday, February 19, 2015

How to Grow and Harvest Dry Beans


Overview:
Dry beans are easy to grow and can be stored after harvest for a healthy, delicious meal all winter long. There’s a lot of satisfaction in producing your own low-cost, vegetable-based protein on the farm.

Combine beans with corn, rice, or other grains to make a complete protein. Beans are rich in B vitamins and folic acid, contain minerals including iron, selenium, potassium, magnesium and calcium, and are high in fiber.

Planting Time:
Plant beans after the last frost date in your area, and ideally, wait until the soil is well-warmed (70-90 degrees F). Beans should be direct seeded into the soil.

Spacing:
Space seeds 1 1/2 inches apart. Space rows 14 to 36 inches apart depending on your equipment. If growing a small amount of beans to hand harvest, space rows closer together. If using a tractor, space 36 inches apart.

Growing Notes:
Beans do best in moderately rich soil but they will thrive even in somewhat depleted soils, as they have the ability to fix their own nitrogen. Beans do not respond very well to added fertilizer.

If your soil is acidic, add some lime before planting.

If this is the first time you’re planting beans in this soil, make sure to coat your bean seed with inoculant, a specific species of Rhizobium that beans need for sprouting (you can get this from the seed company or farm store where you purchase your seed). Once in the soil, the inoculant will stay there and multiply almost indefinitely, so this is just a first-time planting task.

Mulch during early growth to keep weeds down. Once plants are well-established, they are excellent at shading out weeds.

Pests and Problems:
Cutworms and root maggots sometimes attack seedlings. Thin plants to allow for good air circulation.

Too much rain can lead to rusts, molds, and blights. Avoid working among wet plants. Turn under bean debris at the end of each season and practice crop rotation.

If fall weather is very wet or if frost threatens the harvest, pull plants early and finish drying under cover, such as in a shed, barn or basement. Beans will continue to mature in the pods even after they are picked, so don’t worry too much if you have to harvest immature beans.

As tender annuals, beans are very sensitive to frost. Plant once you’re sure all danger of frost has passed, and harvest early if needed, as described above, to avoid frost damage in the fall.

Maintenance:
Beans are quite easy compared to other crops. Just weed, water and mulch as needed through the growing season.

Beans are fairly drought tolerant, but you must make sure they have enough water while they are forming pods and seeds for a good harvest.

Harvesting:
Dry beans are harvested when they rattle in the pod. Pull up the plant by hand and hang from the roots. Traditionally, bean plants are lashed to a 5- to 7-foot high pole. You can harvest up to 5 acres of beans by hand but more than that will need specialized harvesting equipment for your tractor.

Dry beans require threshing – getting the beans out of the pods. For small amounts, you can do this by hand by squeezing the pods open. A traditional method is to hold the plant by the roots and bang it against the inside of a barrel. For more than about a half-acre of beans, you might want to invest in threshing equipment.

After threshing, beans must be cleaned and sorted. For small amounts, do this by hand, using a screen and a hair dryer to blow off debris (or an air compressor if you have it). Split beans can be fed to farm animals. For large bean harvests, you can buy a seed cleaner.

If beans are soft (bite one and see), continue drying them until they feel firm to the bite before moving them to storage.

Freezing beans before storage kills any potential insects such as the pesky bean weevil.

Storage and Preservation:
Store dry beans in a dry, cool, airtight container away from sunlight. Beans are best used in the season after they have been harvested, but they will last for several seasons if needed.

Seed Saving:
Beans are self-fertilizing, so you don’t have to space different varieties apart from each other. Just save your best and earliest-maturing seeds for next year.

Wednesday, January 28, 2015

How to Collect, Clean and Store Chicken Eggs

Are those pretty layers that you bought in spring starting to lay eggs? Wondering what the best way is to clean them? It isn't quite as straightforward as you think, and different sources give differing opinions on the best way to clean chicken eggs.

Gathering the Eggs

First things first. Before you worry about cleaning them, you have to gather the eggs. There are things you can do to make sure that the eggs you gather are as clean as possible, minimizing the amount of cleaning you must do.

Keep nest boxes well-feathered. Make sure the hens' nest boxes have plenty of shavings or straw lining them. If there's poop in the nest boxes, clean it out well when you collect the eggs and replace the straw or shavings. Likewise, if a hen has broken an egg, clean out the mess thoroughly, removing all wet or soiled straw.

Gather eggs early and often. One of the biggest reasons for poopy or broken eggs is allowing them to sit overnight in the nest boxes. Some of my hens seem to prefer to roost on the edges of the nest boxes, or even in them! (Bad hens!) Overnight, they poop on the eggs if there are any in the boxes, or step on them, breaking the shells. This makes for a lot more work if we miss a day of egg collecting. If you can manage it, collecting eggs twice a day can help keep them really clean, and also discourages egg eating.

Cleaning the Eggs

Learning how to clean eggs properly is key to keeping your family - and your customers, if you're selling eggs - from getting sick. Make sure if you're selling eggs that you check with your County Extension Office for the local and/or state regulations governing the cleaning of eggs for sale where you live.

Storing Eggs

Once your eggs are clean and dry, package them in egg cartons and label with the date they were collected. Store them in the refrigerator. You don't have to store eggs in the refrigerator, but they will last longer this way. Eggs are good for one month after the date of collection when stored in the fridge. (I actually find they're good for a few weeks after this, but I'd never sell them or even give them away that old. I bake with them or hard boil them.)

Use the float test to check egg freshness: fill a bowl with water and place eggs in it. An egg that floats has too big an air pocket inside the shell; the contents have evaporated too much and it's likely spoiled. Compost it. You can also use a strong light to see how much air space is inside an egg; this is called candling.

Thursday, January 8, 2015

How to Design a Small Farm

You've been designing and planning your small farm in your head for years. Now you're ready - you have the time, energy, and land to make your dreams a reality. But the choices can seem overwhelming. So, where do you start?

Is Farming Right for Me?
That's really the first question you need to ask yourself. Some things to think about: what are your reasons behind wanting to farm? What knowledge do you have of farming - the labor, the techniques, how to garden? Will you be able to slaughter an animal, or part with one you've become attached to?

Set Goals
Before you start scouring the local paper for livestock, take a step back. What are your goals for your small farm? What kind of farm are you planning? It might be a hobby farm, where your farm is a supplement to a full-time job, something relaxing you can do for fun in the evenings and on the weekends. It could be that you want your farm to actually make money, eventually replacing your current job. Or, your goal might be to produce all the food (and possibly power) that you and your family need - homesteading or self-sufficiency.

Consider Animals and Crops
A small farm can range from a half-acre with a few laying hens and a small veggie garden, to 40 acres with cattle, dairy cows, sheep, goats, chickens, pigs, and acres of field crops and veggies. Some of your choices will be limited by your land and resources, but we'll get to that later.

First, let yourself dream. What animals appeal to you? What vegetables, fruits, and grains do you want to grow?
Make a list of everything you envision on your farm - even if it's years from now. This is your dream, your ideal small farm.

Assess Your Land and Resources
This is a great exercise for learning about your land and what's on it. It will give you the information you need to take your vision past Step Two and plan your first year of farming.

Plan The First Year
Here is where you marry your dreams with reality. Look at your list of things you want to grow and animals you want to raise. Read a bit about each animal to get a sense of how much space and care they require. Now check your farm resources. Do you have enough pasture land for those five cows, or will you need to build that over time? Do you have the financial resources to buy fencing for goats?

If you plan to begin a farming business, you'll want to write an entire farm business plan. The dreaming and assessing you just did will help you get started with your mission statement, which is a great place to begin.

Monitor and Reassess
Farm planning is an ongoing process, a work in progress. As you implement your plan, you may find it needs adjusting. Every season, take out your list of dreams from Step Two and the pencil-and-paper sketch of your land from Step Three. Have your dreams changed? Is there more to add, or things you now know you don't want to do?

Each year, sit down with your farm plan and decide what you want to tackle during the coming spring, summer and fall. Before you know it, you'll be well on your way to making your small farm dream a reality.

Friday, November 28, 2014

Scottish Highland cattle

The Scottish Highland is one of the oldest breeds of cattle in the world. Going as far back in time as the sixth century, some historians believe the ancestors of today’s Scottish Highland may have come to Scottish shores from Scandinavia with the Vikings.

Many of today’s Highland breeders subscribe to the theory that the Scottish Highland resulted from the crossing of two ancient Asiatic breeds of cattle called the Bos Longifronsm and the Bos Primigenius. From the Bos Longifronsm the Highland got its long horns, and from the Bos Primigenius, its profuse coat.
However the breed originated, the Scottish Highland obtained many of its characteristics in the Highlands and west coastal islands of Scotland. Exposed to North Atlantic gales and a very severe winter climate, the Scottish Highland evolved to be a tough, self-sufficient breed.

Scottish breeders of the subsequent centuries recognized these invaluable traits in their cattle, and worked to preserve them. Crofters, small farmers who lived in the Scottish high country, relied on the Scottish Highland for survival. The breed’s milk, meat and hair were a source of sustenance for these farmers, and the calves were a valued trade commodity within Scotland and in England.

Although most of today’s Scottish Highland cattle are red or yellow in color, most of the old-time Highland cattle were black. Called Kyloes, these cattle were found mostly on the islands and were on the smaller side. West Highlands, on the other hand, were larger and lived on the mainland. Their reddish coats predominate in modern examples of the breed.

In 1884, the Scottish Highland Cattle Society was formed in the United Kingdom to help preserve the purity of the Scottish Highland breed. Since that time, breed associations have been formed for the Scottish Highland in the United States, Canada, Sweden, Denmark, Germany, Australia and New Zealand.

Monday, November 10, 2014

Breeds Of Pigs

While this index is not 100% complete for all breeds, nor does it contain all the information available for all breeds, it does give you an idea of what you are looking for when you go to purchase a pig. This is where it gets a little tricky. Some highly crossed pigs will resemble a specific breed. It is in your best interest to see both parents before purchasing a pig for breeding. 
Berkshire
A Berkshire shall be:
A black and white animal with erect ears exhibiting Berkshire character.
A Berkshire must have white on all four legs, face and tail (unless tail is docked). One of the white leg points may also be missing.
Must be ear notched within seven days of birth.( This goes for all pigs requiring ear notches)
A Berkshire must NOT have a solid white or a solid black face from the ears forward.
A Berkshire must NOT have a solid black nose.
White is allowed on the ears, but NO solid white may appear on the ears.
Occasional splash of white may appear on the body.
The Berkshire, as seen above, has a few characteristic traits that makes them stand out.

Mulefoot
Mulefoot hogs as mainly black, with occasional animals having white points; medium flop ears; and a soft hair coat

1. Solid, non-cloven hoof.
2. Solid black.( a few white points accepted.)
3. Medium pricked ears. Falling forward not covering the entire face.

Tamworth
The other red pig. Most notable about the Tamworth breed is it’s ability to forage for itself. The Tamworth are originally from central England in the counties of Stafford, Warwick, Leicester, and
Northhampton. While the color may resemble that of a Duroc, the Tamworth is not to be confused with it’s red cousin.
Tamworth Pig Standards
1.Golden-red, abundant, straight and fine and as free from black hairs as possible.
2. Face slightly dished, wide between the ears, jowl light.
3. Ears, large and erect
4. Black hair and black spots are objectionable.

Large Black
 The large Black is known for it’s ability to raise large litters out of doors while being excellent foragers.
Large Black Pig Standards
1. Solid Black snout to tail
2. Large lop ears covering the eyes
3. Long strait face and snout4. Long deep bodies


Hereford
The life blood of our Hereford Breed of hogs is its breeders. Breeders progress and prosperity depend on the kind of hogs raised.
Color Description Updated:
To be eligible for registration they must have 2/3 white face and 2/3 red body. They can not have any white beyond the middle of the shoulders and over the back. They can not have any belt. They must have at least 3 white legs 1 inch high and must go all the way around the leg.

Poland China
Poland China’s are sort of a mystery pig. While the breed can be traced back to a few Ohio counties, it is not known exactly which breeds influenced the creation of the Poland China. Pigs during this era needed to be large and travel easy to get themselves to market.
Poland Chinas fit the bill perfectly.
Poland China Breed Standards:
1: Must be black with six white points (face, feet and switch) with an occasional splash of white on the body. A hog may not possess more than one (1) solid black leg and be determined as a Poland China.
2: Must have ears down (floppy)
3: Must not have evidence of a belt formation.
4: Can not have red or sandy hair / and or pigment.

Chester White
Chester Whites are classified as Heritage Hogs and are known for superior mothering abilities, durability, and soundness.
Chester White Breed Standards:
1: Must be completely white
2: Possesses a dished face
3: has medium fall floppy ears
4: has a full thick coat

You can see in the image that the Chester White’s ears do not lay fully flat over the eyes. Also the Chester White is typically a more pure white hog when compared to Yorkshires and Landrace. Chester Whites have been preferred by packing houses for their superior muscle and white skin which dresses out to a light pink. The Chester White is
known as a Heritage Breed.

Landrace
Landrace are white in color. Their ears droop and slant forward with its top edges nearly parallel to the bridge of a straight nose. Landrace, which are noted for their ability to farrow and raise large litters, are the fifth most recorded breed of swine in the United States.

Landrace Breed Markings and Registration Requirements
No animal to be used for breeding purpose shall be eligible to record:
1. On which there is any hair other than white on any part of the animal’s body
2. Which has upright ears
3. Which has less than six functional teats on each side of the underline or has any inverted teats
4. Where an animal shows evidence of an extra dewclaw. Black spots in the skin are very objectionable and any large spots or numerous black spots located on any part of the hog makes the pig ineligible for registry.
However, a small amount of black pigmentation is allowed on the body of the animal.

Hampshire
Hampshire s are one of the oldest breeds in America. They have erect ears ( meaning they stand straight up). First let’s look at the qualifications of the breed.

Hampshire boars and gilts must meet the requirements (except color markings) along with the following to be eligible to show in a breeding animal class.
1. Black in color with a white belt totally encircling the body including both front legs and feet. Animal can have white on its nose as long as the white does not break the rim of the nose and when its mouth is closed, the white under the chin can NOT exceed what a U.S. minted quarter will cover. White is allowed on the rear legs as long as it does NOT extend above the tuber calis bone (knob of the hock).
2. Must have at least six (6) functional udder sections on each side of the underline.
3. Animals farrowed on or after January 1, 2005, the swirl is no longer a disqualification for registration.

Duroc
The color marking of all Duroc breeding hogs for registration shall be red.
(1) white feet or white spots on any part of the body with the exception of the end of the nose;
(2) black spots, no more than three, none over two inches in diameter on the body;
(3) ridgeling (one testicle) boar;
(4) less than six functional udder sections on each side of the underline.

Yorkshire
Breed Markings and Registration Requirements
The presence of one or more of the following disqualifies Yorkshire pigs from registry:
1. Less than six teats on a side
2. Any hair other than white on any part of the animal’s body
3. Total blindness
4. Hernia or ruptures
5. Hermaphroditism
6. Cryptorchidism
7. One testicle or any pronounced abnormal condition of the testicles
8. Black spots in the skin are very objectionable and any large spots or
numerous black spots located on any part of the hog makes the pig
ineligible for registry
9. Evidence of an extra dewclaw. However, a small amount of black
pigmentation is allowed on the body of the animal.

Thursday, October 23, 2014

How to Feed Goats

Feed is the largest cost associated with raising goats. It can affect herd reproduction, milk production and kid growth. Late gestation and lactation are critical periods for doe nutrition. Nutrition level determines kids growth rates. Goats not receiving adequate nutrition are more prone to disease and will fail to reach their full potential.

Goats require energy, protein, vitamins, fiber and water. Energy is the most limiting nutrient, while protein is the most expensive. Imbalances of vitamins and minerals can limit animal performance and lead to various health problems. Fiber maintains a healthy rumen enviroment and prevents digestive disturbances. Inadequate water intake can cause various health problems.

WATER - Water is the cheapest feed ingredient and often the most neglected. Goats should have free access to clean fresh water at all times. It is critical that they have an adequate supply of water in the Winter months. A mature goat will consume between 3/4 to 1 1/2 gallons of water per day.

PASTURE AND BROWSE- Pasture and browse are the most economical source of nutrients for goats. Pasture tends to be high in energy and protein in its vegetative state. As the pasture plants mature the palatability and digestibility decline, making it important to rotate pastures to keep plants in a vegetative state. Some of the best pastures for goats are Bahiagrass, millet, sorghum, sudan grass and a mixture of a grain, grass and clover. During the early part of grazing season, browse tends to be higher in protein than ordinary pasture. Goats are natural browsers and select plants at their most nutritious state. Goats that browse have less problems with internal parasites.

HAY- Hay is the primary source of nutrients for goats during the winter months. Hay varies in quality and the only way to know the nutritional content is to have it analyzed by a forage testing laboratory. Legume hays- alfalfa, clover, lespedeza- tend to be higher in protein; this also depends on which cutting it is.

Briers and such - Goats love eating multifloral rose bushes, green briers, poison ivy and just about every type of unwanted brush located on your property. Many herds are used specifally to "clean" up overgrown property, which can be more economical than hiring people to do the job.


VITAMINS AND MINERALS- Many mierals are required by goats. The most important are salt, calcium and phosphorus. Vitamins are needed in small amounts. Goats require vitamins A, D, and E. Offer a pre-mix of loose minerals free choice; goats will consume more if loose is available.

GRAIN- It is often necessary to feed grains when forage alone cannot provide enough nutrients. CREEP FEEDING and supplemental feeding of kids does increase growth weight, but should only be done to the extent that increases profits. There are two types of feed- carbon and protein. Carbon or 'energy' feeds include cereal grains- corn, barley, wheat, oats, milo, and rye- various by products feeds such as fat, soybean hulls and wheat middlings. Protein supplements may be of animal or plant origin and include soybean meal, cottonseed meal and fish meal. 14% CP to 16% CP will usually fill the nutritional requirement for various classes of goats.

Monday, October 6, 2014

The Best Way to Select and Store Corn

From a food safety standpoint, we recommend selection of corn that has not been exposed to any substantial amount of heat. Exposure to excess heat can increase the susceptibility of fresh corn to microbial contamination. If you are shopping in the grocery store, your safest bet is corn that is being displayed in a refrigerated produce bin. Next safest would be corn that, while not refrigerated, is still being displayed in a cool store location, out of direct sun and not near a heat source. These same recommendations apply for corn in a farmer's market or roadside stand. Here display of corn in the shade and out of direct sunlight can be important from a food safety standpoint.


Look for corn whose husks are fresh and green and not dried out. They should envelope the ear and not fit too loosely around it. To examine the kernels, gently pull back on part of the husk. The kernels should be plump and tightly arranged in rows. Due to changes that have occurred over time in commercial corn production, corn has become a food where quality is especially important. Over 70% of all corn found in U.S. grocery stores has been genetically modified in the form of herbicide-tolerant, or HT corn, or the form of insect-resistant, or Bt corn. (Bt corn gets its name from the transfer of a gene from the soil bacterium, Bacillus thuringiensis, into the corn. A protein toxin produced by this bacterium helps to kill certain insects that might otherwise eat the corn.) While there is no large scale human research on GE corn and its health impact, we share the concern of many researchers about the introduction of novel proteins into food and their potential for increasing risk of adverse reactions, including food allergies. One way to avoid these potential GE risks is to select certified organic corn, since GE modifications are not allowed in certified organic food.

Traditionally to enjoy the optimal sweetness of fresh corn, it was recommended to eat it the day of purchase. New varieties allow you 3 days to still enjoy its full flavor. Store corn in an air-tight container or tightly wrapped plastic bag in the refrigerator if you do not intend to cook it on the day of purchase. Do not remove its husk since this will protect its flavor. Fresh corn freezes well if placed in heavy-duty freezer bags. To prepare whole ears for freezing, blanch them first for five minutes depending. If you just want to freeze the kernels, first blanch the ears and then cut the kernels off the cob at about three-quarters of their depths. Frozen whole corn on the cob will keep for up to one year, while the kernels can be frozen for two to three months.

Thursday, September 11, 2014

7 Secrets for a High-Yield Vegetable Garden

Yields like these are easier to achieve than you may think. The secret to super productive gardening is taking the time now to plan strategies that will work for your garden. Here are seven high-yield strategies learned from gardeners who have learned to make the most of their garden space.


Expert gardeners agree that building up the soil is the single most important factor in pumping up yields. A deep, organically rich soil encourages the growth of healthy, extensive roots that are able to reach more nutrients and water. The result: extra-lush, extra-productive growth above ground.

The fastest way to get that deep layer of fertile soil is to make raised beds. Raised beds yield up to four times more than the same amount of space planted in rows. That’s due not only to their loose, fertile soil but also to efficient spacing—by using less space for paths, you have more room to grow plants.

Raised beds save you time, too. One researcher tracked the time it took to plant and maintain a 30-by-30-foot garden planted in beds, and found that he needed to spend just 27 hours in the garden from mid-May to mid-October. Yet he was able to harvest 1,900 pounds of fresh vegetables—that’s a year’s supply of food for three people from about 3 total days of work!

How do raised beds save so much time? Plants grow close enough together to shade out competing weeds, so you spend less time weeding. The close spacing also makes watering and harvesting more efficient.

The shape of your beds can make a difference, too. Raised beds are more space-efficient if the tops are gently rounded to form an arc, rather than flat. A rounded bed that is 5 feet wide across its base, for instance, will give you a 6-foot-wide arc above it—creating a planting surface that’s a foot wider than that of a flat bed. That foot might not seem like much, but multiply it by the length of your bed and you’ll see that it can make a big difference in total planting area.

In a 20-foot-long bed, for example, rounding the top increases your total planting area from 100 to 120 square feet. That’s a 20 percent gain in planting space in a bed that takes up the same amount of ground space! Lettuce, spinach, and other greens are perfect crops for planting on the edges of a rounded bed.

To get the maximum yields from each bed, pay attention to how you arrange your plants. Avoid planting in square patterns or rows. Instead, stagger the plants by planting in triangles (as shown here). By doing so, you can fit 10 to 14 percent more plants in each bed.

Just be careful not to space your plants too tightly. Some plants won’t reach their full size—or yield—when crowded. For instance, when one researcher increased the spacing between romaine lettuces from 8 to 10 inches, the harvest weight per plant doubled. (Remember that weight yield per square foot is more important than the number of plants per square foot.)

Overly tight spacing can also stress plants, making them more susceptible to diseases and insect attack.

No matter how small your garden, you can grow more by going vertical. Grow space-hungry vining crops—such as tomatoes, pole beans, peas, squash, melons, cukes, and so on—straight up, supported by trellises, fences, cages, or stakes.

Growing vegetables vertically also saves time. Harvest and maintenance go faster because you can see exactly where the fruits are. And upward-bound plants are less likely to be hit by fungal diseases thanks to the improved air circulation around the foliage.

Try growing vining crops on trellises along one side of raised beds, using sturdy end posts with nylon mesh netting or string in between to provide a climbing surface. Tie the growing vines to the trellis. But don’t worry about securing heavy fruits—even squash and melons will develop thicker stems for support.

Interplanting compatible crops saves space, too. Consider the classic Native American combination, the “three sisters”—corn, beans, and squash. Sturdy cornstalks support the pole beans, while squash grows freely on the ground below, shading out competing weeds. This combination works because the crops are compatible. Other compatible combinations include tomatoes, basil, and onions; leaf lettuce and peas or brassicas; carrots, onions, and radishes; and beets and celery. 

Succession planting allows you to grow more than one crop in a given space over the course of a growing season. That way, many gardeners are able to harvest three or even four crops from a single area.

For instance, an early crop of leaf lettuce can be followed with a fast-maturing corn, and the corn followed by more greens or overwintered garlic—all within a single growing season.

To get the most from your succession plantings:

Use transplants. A transplant is already a month or so old when you plant it, and so will mature that much faster than a direct-seeded plant (one grown from seeds sown in the garden).
Choose fast-maturing varieties.
Replenish the soil with a ¼-to-½-inch layer of compost (about 2 cubic feet per 100 square feet) each time you replant. Work it into the top few inches of soil.

Adding a few weeks to each end of the growing season can buy you enough time to grow yet another succession crop—say a planting of leaf lettuce, kale, or turnips—or to harvest more end-of-the-season tomatoes.

To get those extra weeks of production, you need to keep the air around your plants warm, even when the weather is cold, by using mulches, cloches, row covers, or coldframes.

Or give heat-loving crops (such as melons, peppers, and eggplants) an extra-early start by using two “blankets”—one to warm the air and one to warm the soil in early spring. About 6 to 8 weeks before the last frost date, preheat cold soil by covering it with either infrared-transmitting (IRT) mulch or black plastic, which will absorb heat. Then, cover the bed with a slitted, clear plastic tunnel. When the soil temperature reaches 65° to 70°F, set out plants and cover the black plastic mulch with straw to keep it from trapping too much heat. Remove the clear plastic tunnel when the air temperature warms and all danger of frost has passed. Install it again at the end of the season, when temperatures cool.

Wednesday, September 3, 2014

Carrot - the second most popular vegetable in the world !

There are two distinct categories of carrot in the modern world, the Cultivated Carrot (domesticated) and the Wild Carrot .


The cultivated carrot is the second most popular vegetable in the world after the potato. When you read the nutrition pages you will see and agree why it should be number one. The health benefits of carrots are well established and cover a wide range in human health conditions. In general, carrots are important for healthy eyes, skin, hair, growth, and immune systems. They can lower cholesterol, prevent heart attacks, and help reduce the risk of certain types of cancers. Carrots are packed with nutrients. 

In fact in England the carrot is Number One according to a survey carried out by the National Trust in 2002. Overall, 17% of the 2,carrots of many colors031 people in the survey opted for the carrot. It came ahead of the potato (15%) and broccoli (13%) in a battle of the vegetable patch. Least favourites by those questioned were Brussels Sprouts, Parsnip, Swede and Turnip.

The carrot plant is cultivated across the world for its prized taproot. The plant is biennial and bears flowers during the second year of its life. However, in general, the whole plant is harvested prematurely when the root reaches about an inch in diameter, tender and juicy. Carrots vary widely in colour and shape depending on the cultivar types. The colours are shown in the photo below and shapes and typologies lower down.

Daucus is a worldwide genus of herbaceous plants of the family Apiaceae of which the best-known species is the cultivated carrot. Daucus genus of Umbelliferae Apiaceae, has about 25 species.

The cultivated carrot, hybridised from the wild carrot, can be either an annual (mainly in tropical areas) or a biennial (mainly in temperate areas). It is an erect herb of 20-50 cm tall when mature, and 120-150 cm when flowering. The taproot is fleshy, straight, conical to cylindrical, 5-50 cm long and 2-5 cm in diameter at the top, and usually orange (other colours include: purple, yellow, or white). Daucus Carota is a complex species, botanically comprising both wild and cultivated carrots.

Wednesday, July 9, 2014

Tips for Bringing New Goats Home


If you purchase your goats from a breeder who lives across the country, the breeder is responsible for getting the goats to a shipper, and all you have to do is find out where to pick them up. If you bought the goats from a neighbor and they are trained to lead, just put them on leashes and lead them home. If you’re buying goats in any other situation, you need to figure out in advance how to get them home.


Some of these methods won’t work for large goats, but you can transport goats in the following ways:

Pet carriers or crates with straw or wood shavings for bedding. If you’re moving the goat in an open truck bed in cold weather, cover the crate with a rug or tarp to keep the wind down and keep the goat warmer.

The back of an SUV, van, or the back seat of a car.

Cover the seat with a tarp and towels for those “accidents” that occur during transport.

On the towel-covered lap of a passenger. Goats that are being held and aren’t standing up will not pee on you, but they will poop.

The back of a truck with a canopy. Make sure to put down plenty of straw.

A horse trailer or another trailer with fencing or cattle panels to make it high enough to prevent escape. Cover an open trailer in extreme weather conditions to protect the goats from rain and wind.

Regardless of how you transport your new goats, to make the trip as stress-free as possible, do the following:

Load the goats carefully.

Make sure they have adequate bedding or padding.

Start, stop, and take turns or curves slowly and smoothly.

If your trip will take many hours or days, provide the goats with hay during the trip and stop every 3 to 4 hours to let them eat, drink, and regain their equilibrium.

If you’re getting your first goats, you don’t have anyone to quarantine your new goats from. You just get them situated in their new digs. But if you’re adding goats to an existing herd, you need to quarantine the new goats for at least 30 days.

Friday, June 20, 2014

Ten Tips for Showing Goats


If you have purebred goats and are interested in competing or want to see how your goats compare to others of the same breed, you can show them at fairs and other events put on by different goat associations. Showing has the added benefit of helping you market your goats. Here are ten guidelines to remember:


Practice walking with your goat before the show: Even a well-trained goat may be a little nervous during the show because of unfamiliarity with the show ring, but if you lead-train first, at least the goat has an idea of what you expect.

Thoroughly clean and groom your goat before the show: Buy your goat a nice, clean collar. Trim your goat's hooves so that the judge can see that she walks correctly and doesn't have defects of the foot or leg. Bathe and comb and/or clip your goat according to the standard for that type of goat.

Dress appropriately: Most goat shows require you to wear certain clothes when showing your goats. You won't be barred or removed from a show for wearing other clothes, but if you're being judged on showmanship, you'll lose points.

Keep your goat between you and the judge: To change the side of the goat you're walking next to, do a roll turn. If you're walking clockwise with the lead in your right hand, just before you get to the judge, turn around the front of your goat and change to your left hand. You can reach over your goat to set the legs that are on the far side from you. Always set the legs closest to the judge first.

Move to the front of your goat when the judge views the goats from the rear. As the judge moves to the right side and around to the front of the goat, move to the goat's left side, keeping him between you and the judge. When the judge is in front of the goat, remain on the goat's left side.

Keep your eyes on the judge at all times: The judge will tell you what you need to do and may ask questions about your goat. If you're distracted, you might lose track of what's going on.

Don't talk with your neighbor: Talking with the person next to you while the judge is thinking about placements, comparing goats, or examining each goat is considered rude and distracting.

Remain calm even if your goat is misbehaving: Despite being trained, your goat may get bored, scared, or just ornery and misbehave in the show ring. Don't ever hit the goat or treat it roughly.

Do what the judge asks: You will start by walking the goat clockwise around the ring. Keep your goat under control with her head up, and keep her between you and the judge. If your goat doesn't want to move, gently lift the goat's tail. When the judge asks you to stop walking, set your goat up in a straight line, facing the same direction as the other goats. Stand or squat on the goat's other side or near her head. Stay alert for another request and keep the goat set up.

Keep your goat properly set up: Make sure that your goat's weight is evenly distributed. Don't splay the legs. Set up a dairy doe so that you can see a third of the udder in front and a third behind the back leg. Set up the rear legs first and then the front legs. Hold the goat's head up. Make sure his front legs are straight down from shoulders.

Be a good loser (or winner): After judges determine rankings, they explain their reasons for awarding placements as they did. Listen closely to those reasons. Regardless of your placing, congratulate the class winners and other goat owners who placed ahead of you.

Tuesday, June 3, 2014

Using Guardian Animals to Protect Your Goats

Many goat owners keep livestock guardian dogs, donkeys, llamas, or alpacas with goats as full-time guard animals. Guardian animals can add a substantial cost in terms of training and upkeep, but they may be well worth the effort and time if they work out.

Try to get a guardian animal from a breeder who has used the animals for this purpose and can vouch for (but not guarantee) their pedigree, training, and temperament.

Livestock guardian dogs (LGDs) were bred and have been used for thousands of years to protect goats and sheep in Europe and Asia. They live and bond with the goats, are aggressive toward predators, and are focused on the job. These dogs are traditionally white, which enables them to blend in with the sheep flock and be distinguished from predators. Of the many breeds of livestock guardian dogs, the Great Pyrenees is probably the best known. Other common livestock guardian breeds include :

                      Anatolian
Don't buy a herding breed such as Australian shepherd or border collie to guard your goats; they aren't qualified. Their job is to herd, and you may have a problem with them chasing goats. That isn't to say that some haven't been successful, just that they are unlikely to do a good job protecting goats.
Donkeys have been used for hundreds of years to guard sheep and other herd animals. They're very intelligent and have good hearing and eyesight. They work better alone and don't like dogs, so they can't work as a team with an LGD. Donkeys' dislike of dogs also makes them effective against coyotes.

Because donkeys are naturally herd animals, if they're bonded to the goats, they can be counted on to stay with them most of the time. Ideally, you get a guardian donkey at birth or as soon as it's weaned to make sure it bonds with the goats. Because they eat the same food as the goats, donkeys also will want to stay with the herd after they realize that's where the food is.

When a guardian donkey becomes aware of a predator, she situates herself between the intruder and the herd and brays loudly. If the animal doesn't leave, she chases it, and if that doesn't work, she attacks by rearing up on her hind legs and coming down on the predator with her front feet.

Llamas and alpacas are good guardian animals because they bond quickly to goats and also eat the same feed. Castrated males make the best goat guardians. Males can injure goats by trying to mount them and can be too aggressive toward humans as well.

Unlike dogs, llamas work better as guardians when they're alone instead of in a pack. A llama and guard dog combination can be trained to work cooperatively, though.

Llamas need strong fences to help them do the job. If a guardian llama can't scare off a dog or coyote with his aggressive attitude, the predator may kill him.

Tuesday, May 13, 2014

Where to Find Goats to Buy


Finding goats to supplement your green lifestyle or to raise as pets isn't difficult. If you're looking for a rare goat breed or have very specific needs, finding the goats you want locally might be a little harder, but take your time and use some of the resources discussed here:

Local feed stores: Get acquainted with the proprietors of local feed stores. Often, the owners or clerks at the feed stores know the farmers in the area and are willing to direct customers to them. They also usually have a bulletin board with livestock and farm-related ads, business cards, and flyers — a good place to start in your search for goats.

Agriculture papers or thrifties: These publications are a good place to look for goats for sale in your area or a short drive away.

Registries and goat clubs: A breed club promotes the breed they're interested in and sometimes sponsors shows. A registry is usually a nonprofit association that keeps a herdbook on goats. When you join, you get a member handbook or contact information for other members who have the type of goat you want.

Breeders' Web sites: You can find people who breed the type of goat you want by going directly to their Web sites. Just search for the type of goat you want and the word breeder. You'll find a number of Web sites, usually with pictures, pedigree information, and sales pages. Some breeders also include information on their management practices and helpful hints for raising goats.

UNFarms: UNFarms is a good resource for finding goats locally and often at a competitive price. Just go to the site for your city or a close city and look in the farm and animals sale section.

Wednesday, April 16, 2014

Toggenburg Dairy Goat


Toggenburg is popular dairy goat. They were originated from north eastern area of Switzerland. They are very big sized. Dairy goat breeders of India, Malaysia, Philippine, Venezuela, South Africa etc.  are raising Toggenburg goats for the purpose of commercial milk production. 
Milk production is about 3 liters/day and the world record 2613 kg/lactation or 12.5 kg/day. They can produce milk for a long time if not served and are good for upgrading local breeds.So they are among the best dairy goat breeds.


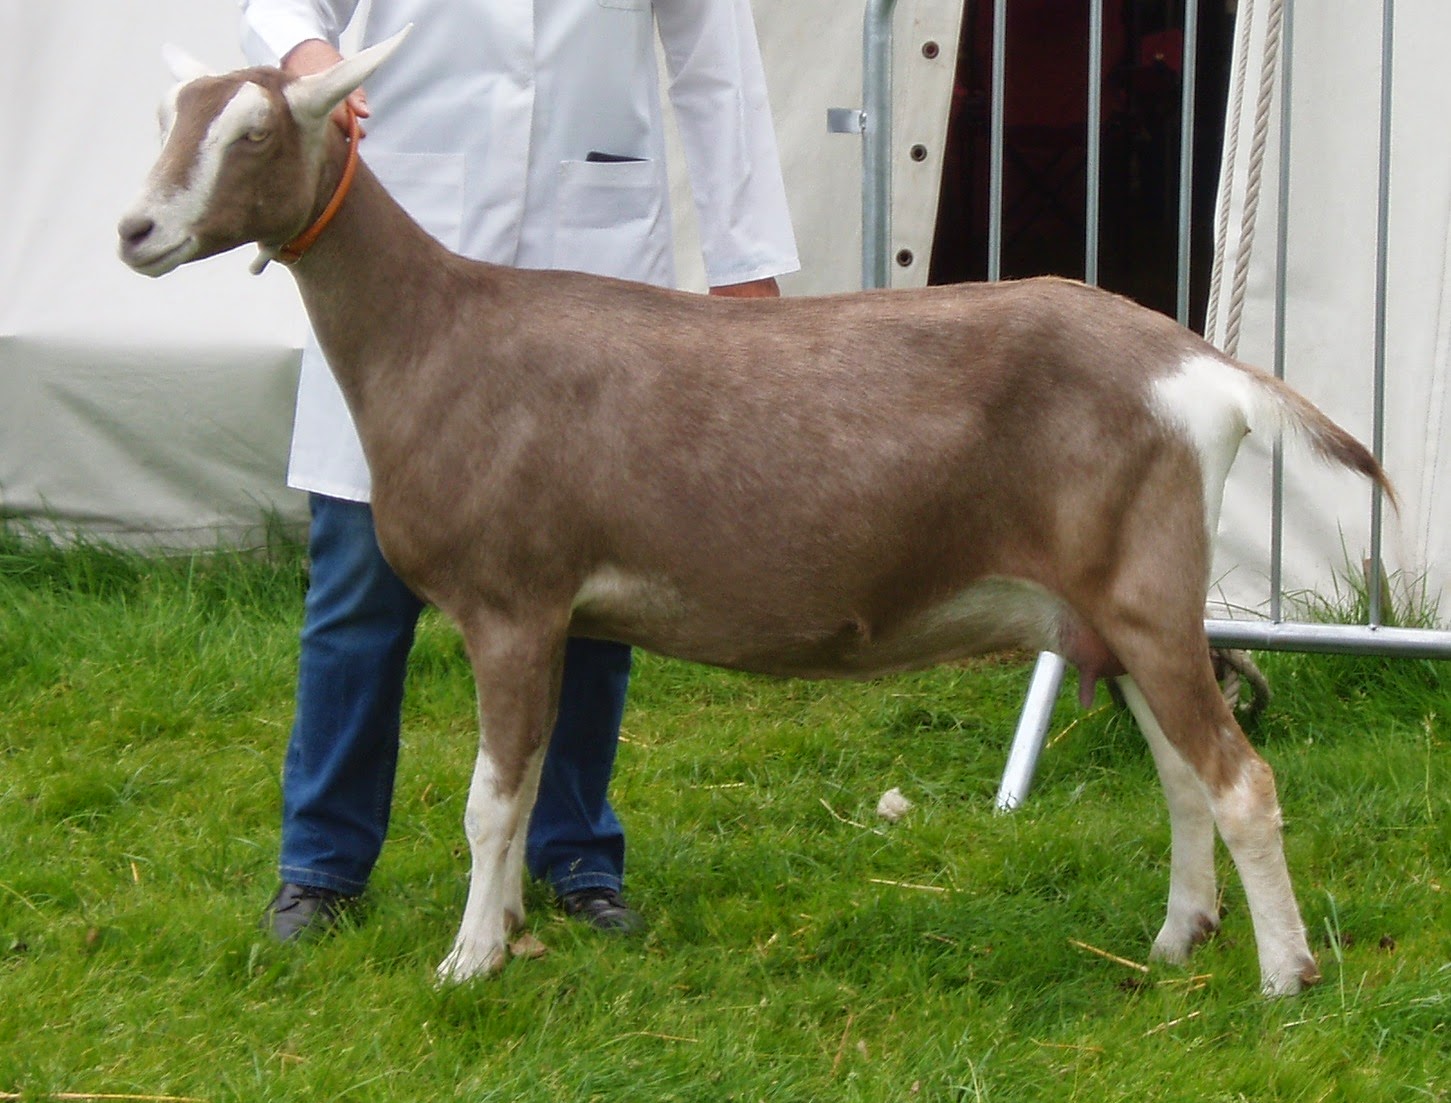
The color of Toggenburg goat’s body brown or chocolate.
They have white spots in their knee and mouth.
Throat is long, light and straight.
Ears are black colored but white near neck.
Both male and female goats don’t have any horns.
A female Toggenburg goat can produce about 3 kg milk daily.
They love to graze in the field.
An adult male goat weights about 60 to 65 kg and female 70 kg.


Friday, March 21, 2014

The Benefits of Raising Goats

You get a lot from keeping #goats. Raising goats can help you achieve a sustainable lifestyle. You can #milk them or eat their #meat, use their #fiber and their skin for making clothing, and even use their dung for fuel (if you are so inclined).
You may want to raise goats for a variety of reasons:

Becoming more self-sufficient: Goats can give you milk to drink and food to eat, and even help you carry your belongings when backpacking.

Cutting your dairy bill: If you raise dairy goats, you might not have to buy cheese or milk ever again. Your goats need to have kids to give you milk, and then you can milk them throughout the year for up to three years without re-breeding.

Raising your own meat: Goat meat has always been popular in the developing world because goats are much more affordable and use fewer resources than animals such as cows. According to the U.S. Department of Agriculture, the demand for goat meat is expected to continue growing.

Growing your own fiber: Some of the finest fiber comes from goats: Angora and Pygora goats produce mohair, cashmere goats produce cashmere, and crosses between the two breeds produce a fiber called cashgora.

If you raise fiber goats, you can spin your own yarn and make hats, blankets, sweaters or other products. You can also sell the fiber to spinners or to companies that make these products.

Harnessing goats' power as living weed whackers: Goats are well-known for their ability to wipe out weeds. In fact, some people have made businesses out of renting out their goat herds to cities and other municipalities to clean up areas that are overgrown with weeds or blackberry bushes. These leased goats decrease the need to use herbicides, improve the soil's fertility, decrease the risk of fire, increase the diversity of plants in the area, and control weeds in hard-to-reach areas, such as steep hills.

Breeding and selling: Unless your goats are just pets or brush eaters, you probably want to breed them. If you have dairy goats, you need to breed them to keep a good supply of milk flowing. And you need to replace any goats you sell or slaughter.

Keeping goats as pets: You can leash train goats and take them on walks throughout the neighborhood or around your property, which provides exercise for all of you.

Using your goat for packing: Goats are social animals and, after you establish a relationship with them, they love to spend time with you. They enjoy going for hikes and can carry your belongings; they find plenty to eat right there in the wilderness.

Raising goats as a 4-H project: Getting children involved in raising goats is a good way to teach responsibility. Keeping goats requires twice-a-day chores. Children quickly learn that the goats depend on them. They also find out about the cycle of birth and death and get outdoors to get regular exercise.